Why This ?

"10% |uC|< , 20% 5|<1||,

15% c0nC3N7R473 4Nd P0\/\/3R 0ph \/\/1|| ,

5% p|345Ur3 , 50% p41N ,

4nD 4 100% r3450N 70 r3m3mB3R 7H3 N4M3"

Upload Your Files Here

Total Visits

Sunday, May 17, 2009

Removing Invalid Entries in the Add/Remove Programs Tool


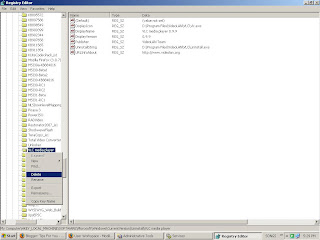
The following steps remove only the registry entries related to a program as it appears in the Add/Remove Programs tool. To completely remove a program that was not completely removed by clicking the Change/Remove button in the Add/Remove Programs tool, you need to clean up the physical directory structure on disk and in the registry as well. Use extreme caution when you perform either of these tasks.

To remove a program reference viewable in the Add/Remove Programs tool:
  1. Start Registry Editor (Regedit.exe).
  2. Locate the following key:
    HKEY_LOCAL_MACHINE\SOFTWARE\Microsoft\Windows\CurrentVersion\Uninstall
  3. Locate the key to be deleted by locating the key name created by the program. If the name of the key is not apparent, browse through each key and note the value for DisplayName. This is the viewable string in the Add/Remove Programs tool.
  4. Using the Registry menu, export the selected registry key to make a backup. Store the .reg file in a safe location in case you need to import it at a later date.
  5. Delete the selected registry key and its values. Do not delete the entire Uninstall key.
  6. Quit Registry Editor.
  7. Verify that the reference in the Add/Remove Programs tool is no longer visible.
You may have to contact the manufacturer of the program that you want to remove if you need to clean up the disk and registry entries. The procedure described in this section does not remove all the files and registry entries used by the program; it removes only the reference in the Add/Remove Programs tool.

Thursday, April 30, 2009

"Could Not Clear DNS Cache" - Problem Solved


This problem occurs if the DNS Client service is not running on the computer.

To resolve this problem, follow these steps:
  1. Click Start, click Run, type services.msc, and then click OK.
  2. In the list of services, click DNS Client.
  3. Make sure that the Status column displays Started and that the Startup Type column displays Automatic.
  4. If the service is not set to Started or if the startup type for the DNS Client service is not set to Automatic, follow these steps:
    1. Right-click DNS Client, and then click Properties.
    2. In the DNS Client Properties dialog box, click the General tab, and then click Automatic in the Startup type list.
    3. Click Start, click Apply, and then click OK.

Tuesday, March 31, 2009

Configure Outlook Express Using Gmail


1. If you have an Gmail account then Ok, otherwise create an Gmail account.
2. Open Microsoft Outlook Express from start menu.
3. Then in Outlook Express Window, goto Tools->Accounts->Add->Mail
4. In the new window type your name (e.g John Smith). Click Next.
5. Type your Gmail id (e.g john@gmail.com). Click Next.
6. Select "POP3" as your incoming mail server.
7. Type "pop.gmail.com" in the text box for your incoming(POP) mail server.
8. Type "smtp.gmail.com" in the text box for your outgoing mail(SMTP) server. Click Next.
9. Now type your login id( e.g john) in the text box for your Account Name.
10. Then type your password(e.g *********) and make sure you check the box named Remember Me.
11. Click Next then click Finish.
12. Cl0se all the sub window except the main Outlook Express Window.
13. Again goto Tool->Accounts. Click on the tab named Mail.
14. Select your account and click on Properties just on the right.
15. Click on the tab named Server, check the chock box name My server requires authentication.
16. Click in the tab named Advanced, type 465 and 995 in the text box named Outgoing Mail(SMTP) and Incoming Mail(POP3) respectively. Do not forget to check the two check boxes named This server requires a secure connection(SSL). Click OK.
17. Configuration complete. Now you can send or receive emails using Outlook Express.

Earn Money By Sharing Your Files

Earn Money While Surfing

Secure Money Transfer Through Internet